
Welcome to "Step-by-Step Installation," where we provide comprehensive guides to help you install ON AIR suspension systems on your vehicle. Whether you're a seasoned DIY enthusiast or a first-time installer, our step-by-step instructions, detailed diagrams, and helpful tips will guide you through the installation process with ease. Join us as we take the guesswork out of installing ON AIR suspension systems and help you transform your ride into the ultimate driving machine.
Chapter 1: Pre-Installation Preparation Before you begin the installation process, it's essential to prepare your vehicle and gather all the necessary tools and materials. In this chapter, we provide detailed instructions on how to prepare your vehicle for installation, including safely lifting and supporting your vehicle, disconnecting the battery, and gathering the required tools and equipment.
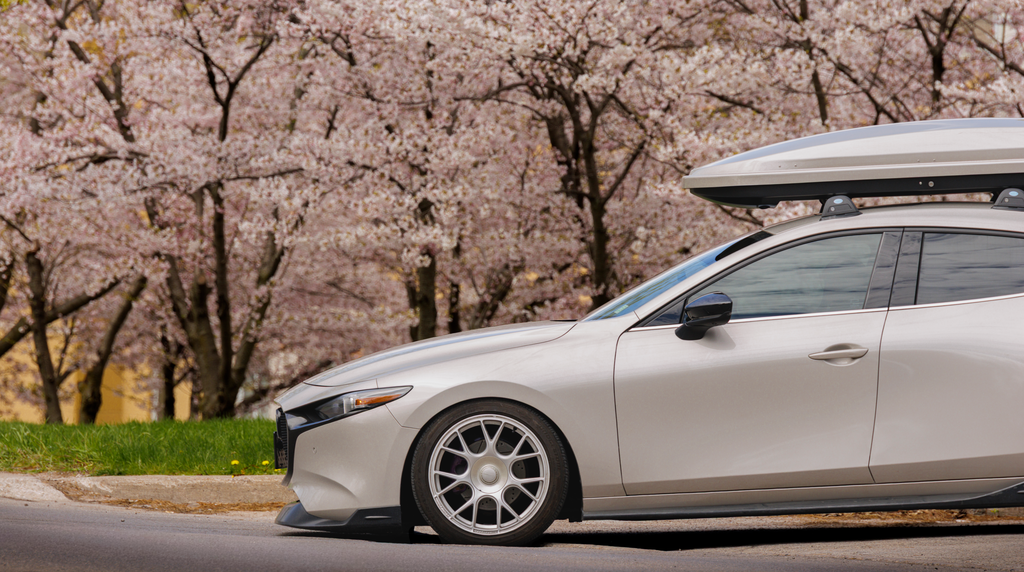
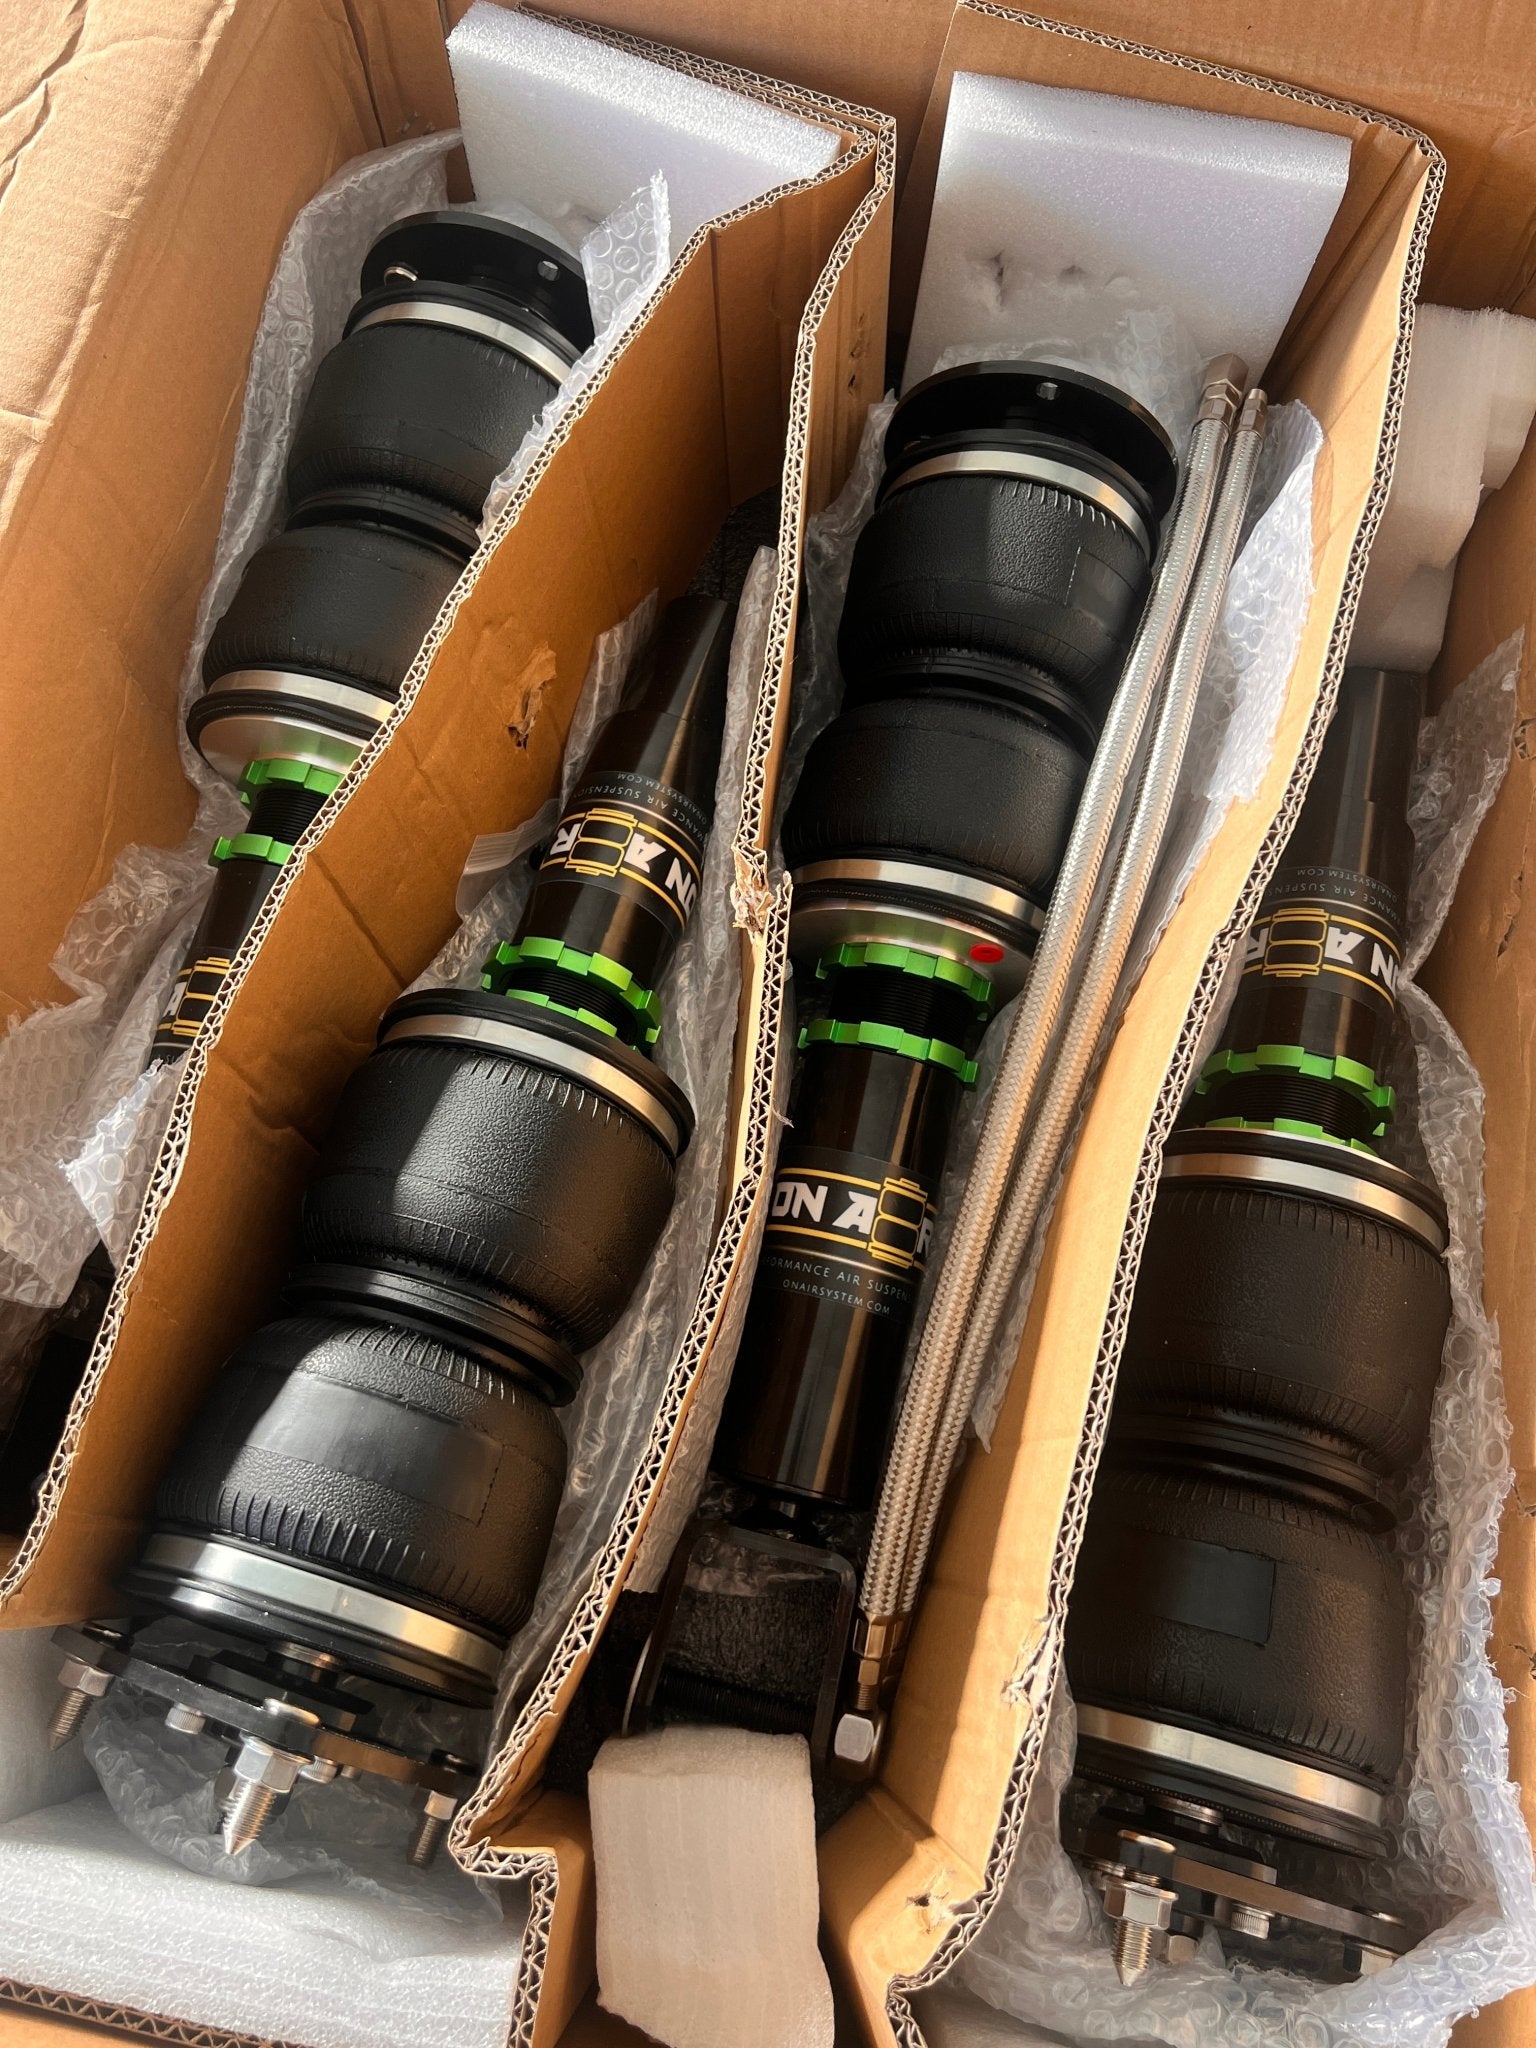
Chapter 2: Air Spring Installation The first step in installing an ON AIR suspension system is to install the air springs, which replace the factory coil springs and provide adjustable ride height and stiffness. In this chapter, we provide step-by-step instructions on how to remove the factory coil springs and install the new air springs, including mounting brackets, air lines, and fittings.
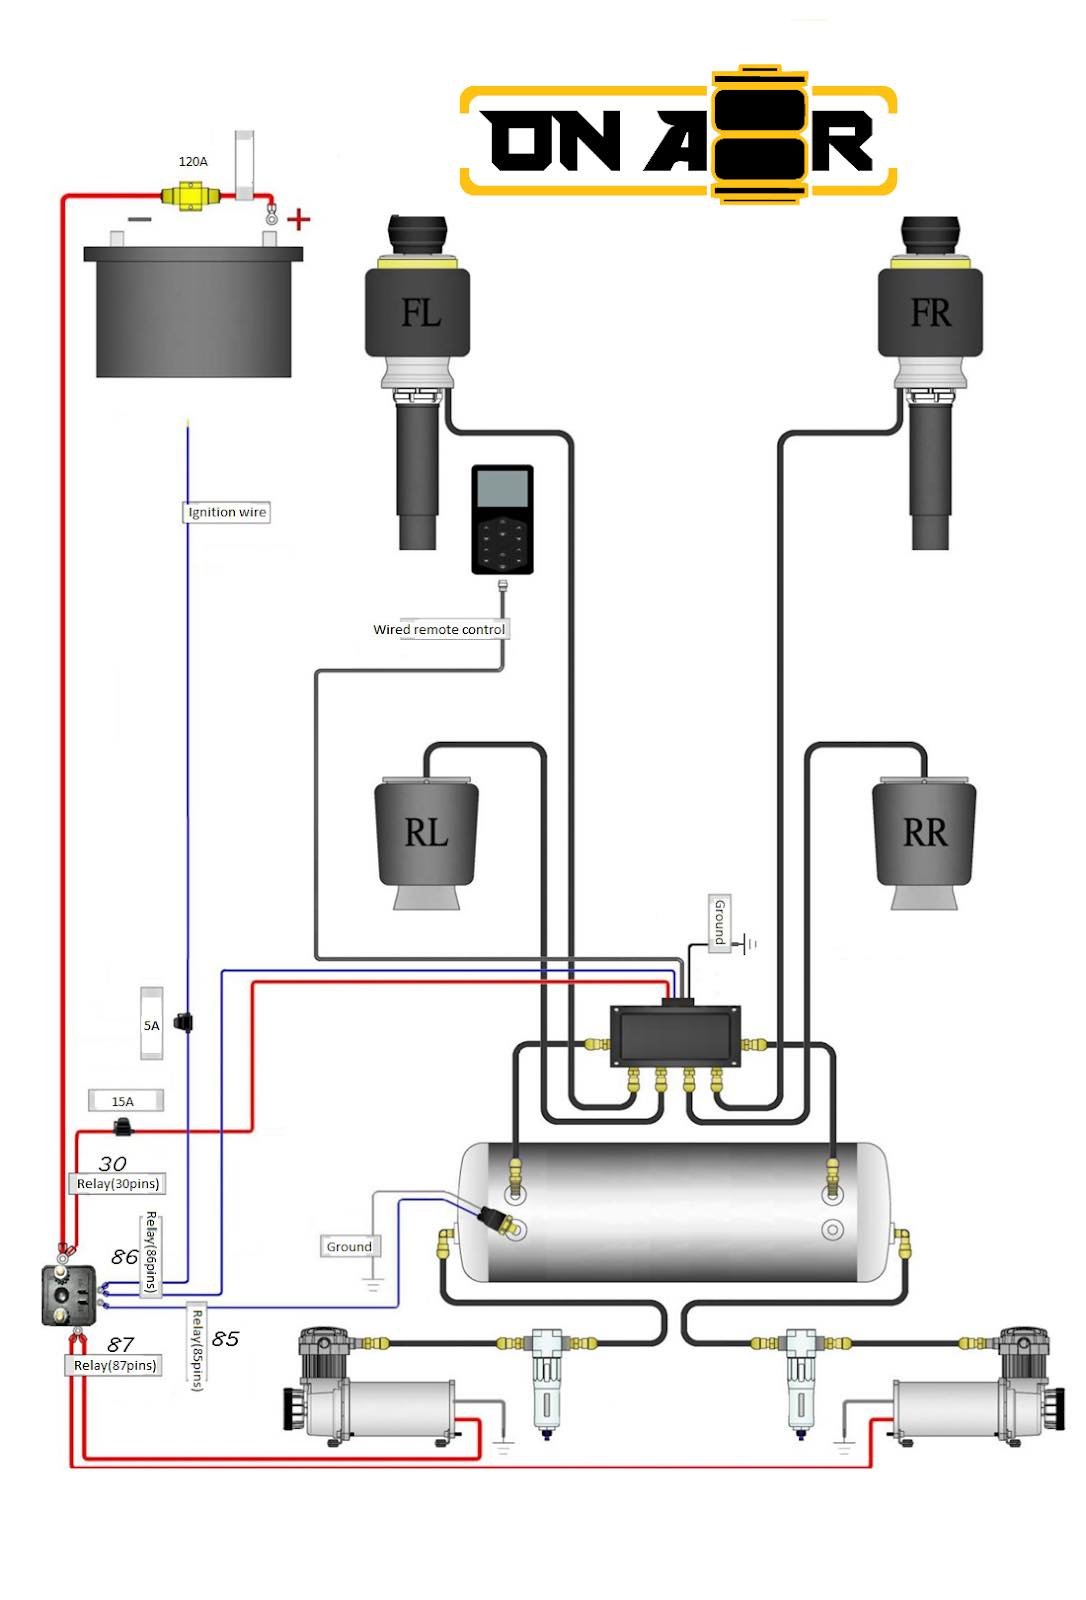
Chapter 3: Control Module and Components Installation Once the air springs are installed, the next step is to install the control module and other components that control the operation of the ON AIR suspension system. In this chapter, we provide detailed instructions on how to mount the control module, connect wiring harnesses, and install other components such as sensors, compressors, and air tanks.
Chapter 4: Air Line Routing and Connections With the air springs and control module installed, the next step is to route the air lines and make the necessary connections to ensure proper operation of the ON AIR suspension system. In this chapter, we provide guidance on how to route air lines safely and efficiently, avoiding sharp edges, hot surfaces, and other potential hazards, and how to make secure connections using fittings and connectors.
Chapter 5: Final Adjustments and Testing Once the installation is complete, it's essential to make final adjustments and test the ON AIR suspension system to ensure everything is functioning correctly. In this chapter, we provide instructions on how to adjust ride height, damping settings, and other parameters using the control module, as well as how to perform a thorough system test to identify any potential issues or concerns.
Conclusion: Thank you for joining us on this journey into the world of ON AIR suspension system installation. By following our step-by-step instructions, detailed diagrams, and helpful tips, we hope to empower you to install ON AIR suspension systems with confidence and ease. Stay tuned for more installation guides, tips, and tricks to help you get the most out of your ON AIR suspension system.
Featured blogs
Learn more from our ONAIR articles
- November 25, 2024
Choosing Between the ONAIR 2V and 4V Management Systems: Which is Right for You? ONAIR offers two exceptional air ride...
- September 13, 2024
When upgrading your vehicle with air suspension, one of the most important decisions is choosing the right tank and...

- March 24, 2024
As winter approaches, driving conditions become increasingly challenging, but with the right preparation and techniques, navigating snowy and icy roads...

- October 15, 2024
When people think about air suspension, they often envision show cars, low stances, and flexing at car meets. But the...

- March 24, 2024
Welcome to Customer Testimonials, where we showcase the experiences and feedback of ONAIR enthusiasts from around the world. From improved...

- February 05, 2024
Air bags and coilovers serve different purposes and excel in different areas, so the choice between them depends on the...
- April 23, 2024
Welcome to ONAIR Automotive Ltd. At ONAIR, we believe that every vehicle deserves to stand out with the ultimate in...
- Choosing a selection results in a full page refresh.
- Opens in a new window.
Select your country and language
★ Reviews